Chain Windows
Chain Windows are used to group together different windows to walk the cashier through a range of choices. These choices can involve modifiers such as toppings on a pizza or hamburger but can also be used for things like preparation instructions or other usages.

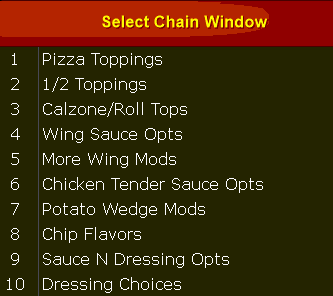
In order to view and edit your chain windows you will need to select the ![]() button along the top of the screen. This will bring up a selection window allowing you to choose an existing chain:
button along the top of the screen. This will bring up a selection window allowing you to choose an existing chain:
You can also add a new chain by choosing the ![]() button and filling in the requested information on the Chain Window Settings Screen:
button and filling in the requested information on the Chain Window Settings Screen:

|
Chain Window Name |
Name of the Chain Window, this is used in menu creation and not seen by the cashier |
|
Upsell Prompt |
Prompts the cashier with a new window that they can choose Yes or No on |
|
Upsell Prompt No Chain |
If cashier chooses NO on upsell prompt they will be taken to the chain window listed here. If blank, or cashier chooses YES, they will be taken to the chain window designated |
|
upsell prompt no chain force |
sets the number of choices that must be selected on the chain window if NO was selected on the upsell |
The ![]() button will also access the Chain Window Settings screen so you can change these settings on an existing chain as well.
button will also access the Chain Window Settings screen so you can change these settings on an existing chain as well.
Choosing the ![]() button will bring up additional chain window options:
button will bring up additional chain window options:

These options allow you to either clone or copy another chain window to the currently open one.
- CLONE a layout: everything will be copied over and the menu buttons in the open window will remained linked to the menu items.
- COPY a layout: the buttons will no longer be linked to the menu items making it easier to setup new linkages.
- Clear All Buttons: will blank out the currently open chain window allowing you to start over
Once you are viewing a chain, either an existing or new chain, you can edit the buttons using the same method discussed in the 'Available menu Section':
Use the list view on the side of the screen to choose an item group (bottom list) and menu item (top list) to assign to a button. You can use the text entry field to narrow the list of menu items:

Use the ![]() button along the top of the screen to toggle the button text between the menu item names and the item numbers. NOTE: Toggling between Names and Item Numbers is for visual purposes in the editor only and will not affect button text on the menu screens.
button along the top of the screen to toggle the button text between the menu item names and the item numbers. NOTE: Toggling between Names and Item Numbers is for visual purposes in the editor only and will not affect button text on the menu screens.
Choosing the ![]() button will open the Menu Design screen and allow you to customize your screens by adding and removing buttons. Additionally, this screen allows you to set a schedule for when the buttons appear. This is useful if you have items that are only available during certain times of the day such as a breakfast screen or late-night menu options. Pressing the button a second time will exit the Design editor and return to the menu item selection screen.
button will open the Menu Design screen and allow you to customize your screens by adding and removing buttons. Additionally, this screen allows you to set a schedule for when the buttons appear. This is useful if you have items that are only available during certain times of the day such as a breakfast screen or late-night menu options. Pressing the button a second time will exit the Design editor and return to the menu item selection screen.

You can add new buttons or change the shape of existing buttons by using the preset button forms along the left side of the screen.
Once buttons are placed on the grid they can be moved or resized at will. Additionally, you can change the button shape and colors:
